Troubleshooting: Ultimate guide to fixing machines
- Mar 21, 2025
- 21 min read
Mechanical Troubleshooting: Chapter 1
Introduction to Mechanical Troubleshooting
In this module, we will learn about the importance of troubleshooting mechanical systems. We’ll also learn about steps to troubleshoot these systems. Skip to Quiz!
Troubleshooting
Mechanical systems consist of simple mechanisms to create complex machines. Simpler mechanical systems are levers, pulleys, screws, wheels, and axles. In comparison, some more complex systems are pumps, valves, and fans.
Mechanical failure is likely to occur in a mechanical system, be it a simple or complex machine. Machine failures are classified into:
Sudden failures,
Intermittent failures, and
Gradual failures.
A sudden failure is an unexpected breakdown in machinery. An example of this is a melted wire due to overheating.

Intermittent failures come and go, usually on their way to a complete machine failure. Think of a flickering light in your home. It will keep flickering for a few days, and then quit.
A gradual failure reduces the performance of a machine over time. These include things like:
Slowly shedding of a belt,
Dulling of a pipe, and
Pipes that eventually clog with residue buildup.
The common signs of failure in mechanical components are:
An increase in vibrations,
Excessive component heating, and
Leaky joints.
Aside from non-typical vibration and heating, other failure indications are:
Clogged pipes,
Corroded pipes,
Burning smells, and
Abnormal sounds.
The failure of a machine component can cause business interruption. For example, an unplanned machine failure could shut down an entire production line. This is because a business has to remain closed until repairs or replacement of its equipment can take place. During a business interruption, other equipment and resources like rent, wages, and salaries still have to be paid. This makes it necessary to troubleshoot any failure that occurs in a system as soon as possible.
Troubleshooting is a method of finding the cause of a problem and corr ecting it. The ultimate goal of troubleshooting is to get equipment back into service as quickly and as thoroughly as possible.
Troubleshooting is the identification and resolution of problems, especially problems of a technical nature. In comparison, a repair is fixing the damaged condition of the equipment.
Think of a punctured tire. During troubleshooting, we find the exact location of the puncture and solve the problem. Repair is the process of fixing the hole in the tire. During a repair, we know exactly what is wrong with the equipment and how to solve the problem.
A troubleshooting technician must have the following skills to troubleshoot a problem:
A good understanding of a system's workings,
Attention to detail so they can spot the slightest errors in equipment,
Understand everybody’s interests,
Communicate decisions, and
Technical skills and experience.
Technical knowledge and experience helps in improving troubleshooting skills. Apart from technical knowledge, troubleshooters need to know the cause of mechanical failure. This will help to reduce future failures of a machine.
Common causes of mechanical failures are:
Not reading the operator's manual,
Improper maintenance, and
Overrunning machines.
Constantly pushing machines to run at maximum performance can strain joints and machine failure is more likely to occur. That’s why proper maintenance of machines is necessary. For example, it’s essential to lubricate all moving parts periodically.
Mechanical failures can also occur because of:
Not replacing worn parts,
Ignoring warning signals,
Improper storage,
Component misalignment, and
Poor electrical connections.
We can avoid these mechanical failures if the operator performs proper maintenance on a system.
Diagnosing a Problem
If machine failure occurs because of improper maintenance, the troubleshooter needs to diagnose the problem. The troubleshooter needs to ensure that the problem is rectified and does not mask another issue, which could repeat the breakdown.
The five basic steps required to troubleshoot equipment are:
Verify a problem exists,
Narrow down the problem’s root cause,
Correcting the cause,
Verify the problem is corrected, and
Prevent future issues by following up.
Let’s learn about each step in detail.

The troubleshooting process begins with symptom recognition. A symptom of poor wheel alignment is a car pulling to one side. During this step, the troubleshooter should note all abnormal symptoms and evaluate what’s observed.
The second step of the troubleshooting process heavily relies on the troubleshooter’s technical skills and experience. The troubleshooter is responsible for narrowing down the root cause of the problem.
Troubleshooters should narrow down the causes of failure by:
Looking at low maintenance items first to save time, and
Using built-in features in the appliances to self-test and diagnose the issue.
For example, some refrigerator models have diagnostic test modes to detect the cause of a problem. This test mode allows us to diagnose a malfunction inside a refrigerator. This method helps us to narrow down the cause of a problem.
The third step involves rectifying the problem by performing equipment repair. In this step, the troubleshooter has to ensure that the equipment is ready to use.
Next, we need to test the component to verify if the problem is eliminated. This is always done before the machinery is returned to active service. The purpose of this is to prove that the issue no longer exists.
The fifth and final step in troubleshooting is the follow-up that will limit and prevent future issues. Actions may include:
Altering the preventive maintenance schedule, and
Recommending procedure modifications for more dependable performance.
General Safety
While performing troubleshooting, we always need to wear the proper Personal Protective Equipment (PPE). A lack of PPE leads to many injuries in workplaces. For example, wearing gloves while using a portable grinder or buffing wheel can save you from a sharp cutting blade.
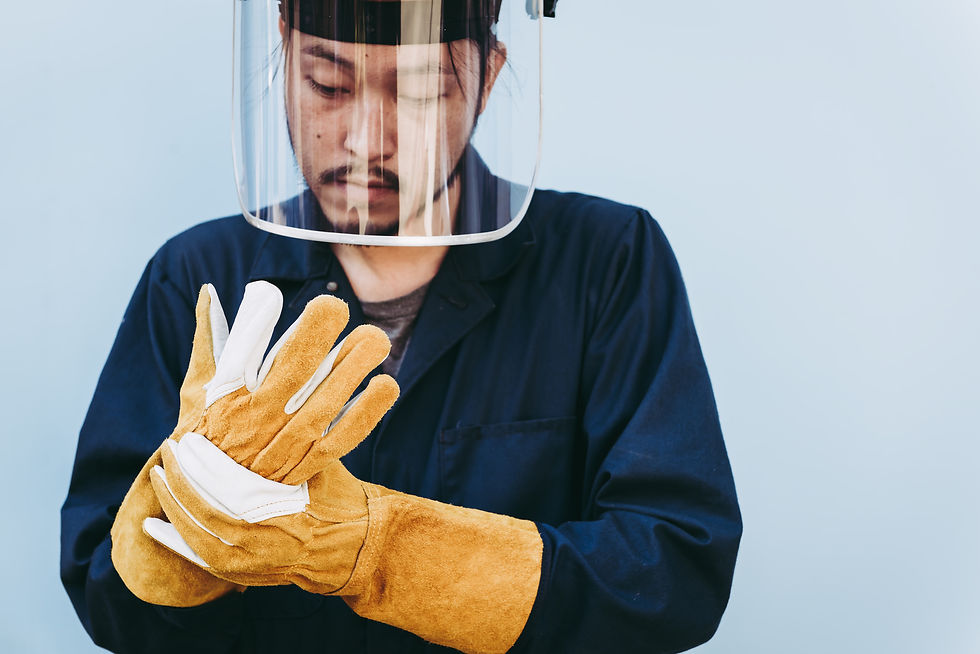
While troubleshooting, we should wear the following safety gear:
Safety glasses,
Gloves,
Safety-toed shoes, and
Hard hats.
We also need to remove all jewelry that could be caught in moving machinery.
We need to use the proper tools for a job while troubleshooting equipment to avoid injury. We also need to make sure lubricants are correctly labeled and stored. Improper labeling and storage can lead to contamination and the use of the wrong lubricant.
Mechanical failure is likely to occur in a mechanical system, whether a simple or complex machine. During business interruption, the cost of other equipment and resources still has to be paid. This makes it necessary to troubleshoot any failure that occurs in a system.
The five basic steps required to troubleshoot equipment are:
Verify a problem exists,
Narrow down the problem’s root cause,
Correcting the cause,
Verify the problem is corrected, and
Prevent future issues by following up.
The following safety gear is important to wear while troubleshooting to protect ourselves from harm:
Safety glasses,
Gloves,
Hard hats, and
Safety-toed shoes.
General Mechanical Troubleshooting
In this module, we will learn about common failures of mechanical systems. We’ll also learn about how to troubleshoot these failures. Skip to Quiz!
Common Failures
Recall that common failures in a mechanical system are:
Corrosion,
Pipe clogs,
Leaky joints,
Wear,
Vibration and noise,
Lubrication failure, and
Overheating.
Let’s go over each of these in detail.
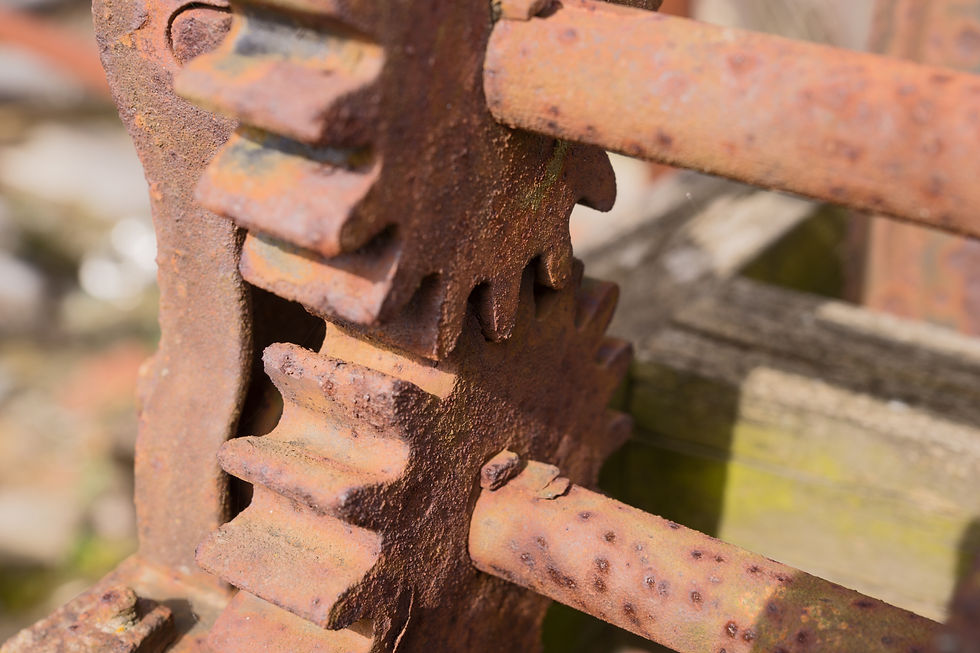
Corrosion
Corrosion occurs when metals are exposed to moisture and oxygen. Recall that all mechanical systems, from a simple lever to complex valves, are made of metals. When these systems are exposed to moisture and oxygen, iron and steel will react, forming an oxide.
Recall that peeling paint damages our home walls. Similarly, oxide formation results in the flaking off of material from a metal surface, leading to cavity formation.
Cavity formation is similar to cavities in our teeth. Like germs that eat into our teeth, oxygen in the air flakes off metals and forms a cavity. If corrosion is not prevented, it can cause the failure of a mechanical system.
Corrosion of vital industrial parts, like couplings and gearboxes, is one of the most common causes of equipment failure. That’s why we need to troubleshoot rust formation on these components.
It’s easy to locate rust, as it can be visually detected. After locating rust, we need to spray WD-40 over the rusted surface and wipe off the rust using a pad. If that does not remove the rust, we can use sandpaper.
To prevent rust from getting on a surface again, we should cover it using protective coatings. Just like brushing our teeth protects germs formation, the paint on metal surfaces protects corrosion. We can apply anti-corrosive coats like inorganic paints on a surface.
Pipe Clogs
Apart from machines, corrosion is most likely to occur in pipes. This is because water or moisture inside a pipe reacts with steel to form iron oxide. The amount of iron rust deposits generated has the potential to clog a pipe.
Food and substances that do not break down will build up in our pipes because of clogging.
We need to remove all pipe fittings and check water flow to detect a pipe clog. If water is not flowing through a particular section of pipe, it indicates a clog. Calcium, Lime, and Rust Remover (CLR) solution clear almost all household clogged or sluggish drains in seconds.
Leaky Joints
Recall that corrosion eats away our pipe material. This can create openings for water to leak out.
Leakage can also result from damaged watertight seals on our pipes. These seals can degrade over time, causing leaks at their source. This leakage is easily identified by dribbling water.
If a leak exists in a plumbing joint, the usual solution is to tighten that joint. But when the problem is found on the pipe itself, usually there is a need to remove the leaking section and replace it with a new one.
We need to apply a suitable solution around the portion where the leak is found. We can also remove the leaking section and replace it with couplings.
Wear
Another common machine failure is due to wear of the material. Wear is a failure mode that occurs due to materials rubbing against each other. For example, a pipe resting on pipe support rubs against the support every time the pipe moves.
Wear can be easily located visually. We can eliminate the cause of pipe erosion due to wear by inserting a pipe wear pad between a pipe and a pipe support.
Since pipe wear pads are softer than a pipe's metal, the pipe pad wears instead of the pipe. We can also lubricate the moving components in a machine to prevent wear.
Vibration and Noise
As machine components like ball or roller bearings, drive belts, or gears become worn, they may cause vibration. Vibration can also result when machine shafts are not aligned with a machine axis.

If a machine is vibrating, it makes unusual sounds. For example, if the axes of a motor and pump are not aligned, we can hear disturbing sounds. To troubleshoot the issue of vibration and sound, we need to align the axes by shifting the machine.
We can also prevent vibration by reducing the wear of machine components. Recall that wear can be reduced by lubricating moving components.
Lubrication
Lubrication reduces friction and allows moving machine parts to slide smoothly past each other. Lubrication also helps in:
Cooling by dissipating heat from surfaces, and
Cleaning by transporting contaminating particles to filters.
The two main classes of lubricants that are used in machinery are:
Lubricants need to be applied in an exact amount. This is because under-lubrication risks metal-to-metal contact. In comparison, over-lubrication causes heat build-up and friction as the moving parts continuously push extra grease out of the way.
Overheating
Overheating can also be caused if a machine is running in a much warmer environment. This is because outside temperatures make it more difficult for a machine to cool down properly.
The most likely causes of overheating are:
Blocked ventilation holes,
Using less capacity motor for the application, and
High ambient temperatures.
We need to clean a machine and operate it in the temperature range recommended by its manufacturer.
The common failures in a mechanical system are:
Corrosion,
Pipe clogs,
Leaky joints,
Wear,
Vibration and noise,
Lubrication failure, and
Overheating.
We need to fix these common failures to avoid total system failure.
Anti-corrosive coats can prevent corrosion. Lubrication reduces friction and allows moving machine parts to slide smoothly past each other. Wear can be reduced by lubricating moving components, which will help reduce vibrations and noise.
Troubleshooting Static Machine Components
In this module, we will learn about the failures of static components in a machine. We’ll also learn about how to troubleshoot these failures.Skip to Quiz!
Static Machine Components
A mechanical system consists of stationary and moving components. Some of the stationary components that are part of a mechanical system are:
Mechanical seals, and
Valves.
Let’s look at each of them.
Mechanical Seals
Mechanical seals are leakage control devices used in mechanical systems. Mechanical seals prevent fluids, like water or oil, used by a machine from leaking into the external environment. For example, seals on a pump prevent the leakage of liquids.
Mechanical seals come in various forms. These include:
Spring seals,
Multi-spring seals,
Metal bellows seals, and
Cartridge seals.
Considering that there is more than one type of seal, it’s essential to identify their best application. Most seal failures occur by selecting the wrong seal for the application. So, we should always follow manufacturer recommendations to select a seal type.
Installing a seal in the wrong direction is another common cause of failure. Improper installation and mishandling of mechanical seal parts can cause chips and cracks in a seal ring.
A mechanical seal might fail due to poor lubrication, or no lubrication at all. When there is no liquid around a seal, it will increase the temperature inside a system. This rapid increase in temperature can damage o-rings or rubber on the seal.
A change in operating conditions may affect the performance of a mechanical seal. For example, high-pressure levels inside a pump can potentially cause parts of a seal to break off.
Now that we know the reasons for failure, let’s learn how to identify seal failures. Most seal failures are easy to identify visually. Common signs of seal failures are:
Deep grooves on a seal face,
Cracked seal face, and
Uneven wear tracks.
When you start noticing deep grooves on a seal face, inadequate lubrication may be to blame.
However, these deep grooves could also be caused by abrasive materials present in the fluid used in a pump. When abrasives are embedded in the soft face of a seal, it forms a groove on the seal.
To troubleshoot this issue, flush the seal using proper lubricant. Consider using seal face materials that can withstand abrasive materials in the fluid carried by a pump.
Thermal shock and mechanical seal impact are two reasons a seal face can fracture or crack.
To troubleshoot this failure:
Avoid uneven or over-tightening of seals, and
Eliminate the cause of shock or impact, like misalignment of a shaft.
An even wear track on a seal face usually indicates good contact between the mating seal rings. An uneven wear pattern will usually indicate that a seal ring is distorted due to over tightening, clamping, or excessive pressure.
Other culprits for an uneven wear pattern could be elevated temperatures. We always need to review installation guidelines, techniques, and current operating conditions for the proper running of a seal.
Apply a small amount of grease to the seal and the area of the shaft in contact with the seal. Orient your seal the same way as the initial install. The last step involves the actual pressing-in of the seal.
Valves
Many factors can cause valve failure. Some of the more prominent causes include:
Worn elastomers and seat seals,
Debris in a pipeline,
Operating in excessive high-temperature situations, and
Improper valve installation, maintenance, and assembly.
Failing valves will emit warning signs at the first hint of trouble. For example, failing check valves will start to vibrate and even lose some internal parts when problems arise.
Other symptoms of check valve failure include reverse flow and excessive component wear and damage. Check valves will also emit noises as they start to break down.
Failure of a valve can be identified visually. For example, we can notice too little or too much gas coming out of our gas stove if the gas valve is failed.
Valve failures are caused by damage to the individual components of a valve. The possible causes of component failure are:
Damage to the valve body or valve seat,
Actuator failure,
Coil burn out, and
Damaged seals.
Let’s look at each of them.
Valve seats and valve bodies can corrode over time if there is debris inside a pipe. We can notice a hint that a valve is corroded if there is no water coming out of our tap. To troubleshoot this, we need to clean the valve parts and ensure the pipes are clean too.
Actuators facilitate the movement of valve components, enabling a valve to open and close as needed. If we notice that a valve is not opening or closing automatically, there could be actuator failure.
Common issues in an electric actuator may include motor failure or major electrical issues.
Recall that a solenoid valve is actuated using a solenoid coil. If our solenoid valve stops working, the possible cause could be coil burnout. A symptom of coil burnout is burn marks on a coil.
There are several causes of a burnt coil in a solenoid valve. They include:
Wrong voltage, and
A short circuit.
We need to check the voltage signal using a multimeter to troubleshoot this issue.
A valve doesn't shut off or leak if a seal is damaged or worn. Recall that seals prevent the fluid used by a machine from leaking into the external environment. If a valve is leaking, then the possible cause of the valve malfunction is a damaged seal.
We need to follow general guidelines to troubleshoot valve failure once it has been identified. The first step is to identify the location of valve failure.
After identifying the issue, we need to take necessary troubleshooting steps to solve the issue further. We need to ensure appropriate spare parts are on hand before removing a valve from service.
If it is necessary to remove a valve from piping, we need to follow the appropriate procedure. This includes:
Disconnecting the electric supply, and
Lockout Tagout.
Recall that lockout tagout is a procedure used to make sure that equipment is shut down and tagged before performing maintenance. It’s used to prevent people from working on machines that may injure them.
After a system is shut down completely, we can start disassembling the valve from the pipe. We need to follow proper disassembly and maintenance procedures to resolve the issue. Then, we need to re-install the valve into the piping with correct electrical connections.
For example, to resolve the issue of coil burnout, we need to check the solenoid valve coil voltage specifications. If the voltage is not in range, then we need to change the coil. Install a new coil thats voltage requirements are in line with our power source.
If a valve is damaged, we need to replace the valve.
The valve on the main supply line is closed before replacing the main shut-off valve. We need to actuate and test the valve to ensure proper function. Monitor valves during an initial run to ensure the replaced valve is operating correctly.
Mechanical seals fail because of:
Selecting the wrong seal,
Installation error,
Lack of lubrication, and
Improper operating conditions.
Valves fail because of:
Damage to a valve body or valve seat,
Actuator failure,
Coil burn out, and
Damaged seals.
We need to troubleshoot these issues to avoid system damage.
Troubleshooting Rotating Machine Components
In this module, we will learn about the failures of rotating components of a machine. We’ll also learn about how to troubleshoot these failures.Skip to Quiz!
Rotating Machine Components
Recall that a mechanical system consists of stationary and moving components. Some of the rotating components that are part of a mechanical system are:
Couplings, and
Bearings.
Let’s look at each of them.
Couplings
A coupling is a device used to connect two shafts. A coupling permits some degree of misalignment between two shafts that are connected.
A coupling is classified into different types depending on the shaft alignment. A rigid coupling is used to connect two shafts that are perfectly aligned. In comparison, a flexible coupling is used to connect two shafts with lateral and angular misalignment.
Some external signs that indicate potential coupling failure include:
Abnormal noises, like screeching, squealing, or chattering,
Excessive vibrations or wobbles, and
Failed seals indicated by lubricant leakage.
Some of the prominent causes for coupling failure include:
Selecting the wrong coupling,
Misalignment, and
Installation error.
Let’s discuss each of them in detail.
Considering that there is more than one type of coupling, proper coupling selection is essential. Improper selection of a coupling can lead to coupling failure.
For example, a universal coupling is used when two shafts axis intersects at a slight angle. In comparison, an Oldham coupling is used where two shafts have a lateral misalignment.
Misalignment of a coupling beyond its specifications introduces the possibility of accelerated wear. Excessive misalignment between joined shafts is one of the most common reasons for coupling failure.
When misalignment exists beyond the specifications of a coupling’s manufacturer, we should rectify it with shaft realignment. Then we need to select the appropriate coupling for the application.
After selecting the appropriate coupling for our application, we need to install it correctly. We need to follow coupling installation instructions to avoid installation failure. Far too many times, a coupling is installed without knowing manufacturer specifications, leading to premature failure.
Some of the primary coupling installation instructions might include:
Prepare the coupling and shafts before installation,
Clean mating parts and oil shafts lightly, and
Check to ensure that any misalignment between shafts is within the coupling's ratings.
We need to ensure the proper alignment of a coupling during installation. Always refer to the specific manufacturer's instructions when performing a coupling installation. This reduces the possibility of failure.
Bearings
Bearings are mechanical assemblies that consist of rolling elements and usually inner and outer races. Bearings support and guide components that rotate relative to one another.
There are many reasons why bearing failure may occur. Some of the most common are:
Improper lubrication,
Contamination,
Misalignment, and
Poor-fitting.
Let’s look at each of them in detail.
The majority of bearing failures occur because of lubrication failure. If a bearing has been exposed to excessive temperatures, then it can cause the lubricant to degrade. This will lead to the failure of the bearing.
Contamination of lubricants is another common cause of bearing failure. Contamination is caused by foreign substances getting into bearing lubricants. These include dirt, abrasive grit, dust, steel chips from contaminated work areas, and dirty hands or tools.
While some bearings can handle minor misalignment between a shaft and bearing housing, not all can. Typical causes of misalignment include:
Bent shafts,
Contaminated components, and
Improperly positioned shafts and locking nuts.
Recall that misalignment of a shaft can cause vibrations. This can lead to uneven load distribution. If we do not fix the misalignment, excessive vibration can result in bearing failure.
A bearing needs to be properly mounted to an accurately sized shaft. If a bearing does not fit correctly on a shaft, it can become damaged during installation or while operating. In most instances, bearings should be mounted with a press fit on the shaft.
If a shaft is oversized, it will result in a tight fit. If a shaft is undersized, it will result in a loose fit. Both these fits result in damage to the bearing. Just like a pair of shoes, too tight or too loose can mean an improper or uncomfortable fit.
A bearing can be damaged during the actual installation. Installation damage is easily noticeable. For example, if the bearing is not aligned correctly during installation, it cuts the bearing raceway.
Installation damage can be avoided by using correct tools and handling procedures during assembly.
We need to use proper tools when handling and installing bearings. Avoid general-purpose tools like hammers and screwdrivers. All components used to mount bearings should also stay clear of contaminants.
If a bearing failure occurs, it is essential to know the best tools to dismount bearings. To remove failed bearing, we use bearing pullers. A puller securely grips the component with specially designed jaws before driving it off the shaft.
There are two types of bearing pullers. These include:
Internal bearing pullers, and
External bearing pullers.
External bearing pullers are used when a bearing is mounted onto a shaft. They have jaws that grip the outer diameter of the bearing.
Internal bearing pullers are used to fit a bearing or component within a small gap, with an opening in the inner diameter. For example, for removing bearing in a gearbox casing, an internal bearing puller is inserted into the inner diameter of the bearing.
If a bearing fails, we need to replace it.
A coupling is a device used to connect two shafts. Some of the more prominent causes for coupling failure include:
Selecting the wrong coupling,
Misalignment, and
Installation error.
Bearings support and guide components that rotate relative to one another. Some of the most common bearing failures are:
Improper lubrication,
Contamination,
Misalignment, and
Poor-fitting.
Question #1: What are the types of machine failure? (select all that apply)
Intermittent failure
Sudden failure
Seasonal failure
Gradual failure
Scroll down for the answer...

Answer: Intermittent failure
Sudden failure
Gradual failure
Machine failures are classified into:
Sudden failure,
Intermittent failure, and
Gradual failure.
Question #2: What are common signs of mechanical failure? (select all that apply)
Burning smells
Abnormal sounds
Excessive component heating
An increase in vibrations
Scroll down for the answer...

Answer: Burning smells
Abnormal sounds
Excessive component heating
An increase in vibrations
The most common signs of failure in mechanical components are:
An increase in vibrations,
Excessive component heating,
Burning smells, and
Abnormal sounds.
Question #3: What is troubleshooting?
Fixing the damaged condition
Both identification and resolution of problems
Only identification of problem
Only resolution of problem
Scroll down for the answer...
Answer: Both identification and resolution of problems
Troubleshooting is the identification and resolution of problems, especially problems of a technical nature.
Question #4: What causes mechanical failure? (select all that apply)
Periodic maintenance
Overrunning machines
Component misalignment
Ignoring warning signals
Scroll down for the answer...
Answer: Overrunning machines
Component misalignment
Ignoring warning signals
Common causes of mechanical failures are:
Component misalignment,
Ignoring warning signals,
Improper maintenance, and
Overrunning machines.
Question #5: What is the first step to begin mechanical troubleshooting? (select all that apply)
Altering maintenance schedule
Replacing the machine
Verifying the problem and its symptoms
Lockout tagout
Scroll down for the answer...
Answer: Verifying the problem and its symptoms
The troubleshooting process begins with symptom recognition.
Question #6: Which safety gear should we wear while troubleshooting to prevent injury? (select all that apply)
Safety shoes
Safety glasses
Gloves
Face or respiratory masks
Scroll down for the answer...
Answer: Safety shoes
Safety glasses
Gloves
While troubleshooting, we should wear the following safety gear:
Safety glasses,
Gloves,
Hard hats, and
Safety-toed shoes.
Question #7: How can corrosion lead to machine failure?
It causes heat build-up and friction
It allows machine parts to slide smoothly past each other
It causes the flaking off of material from a metal surface
It results in machine vibration
Scroll down for the answer...
Answer: It causes the flaking off of material from a metal surface
Corrosion causes oxide formation on a metal surface. This results in the flaking off of material from a metal surface, leading to cavity formation.
Question #8: What is the cause of pipe clogs when water is running through a pipe?
Looseness
Misalignment
Corrosion
Overheating
Scroll down for the answer...
Answer: Corrosion
The amount of iron rust deposits generated due to corrosion has the potential to clog a pipe.
Question #9: What is a possible cause of water leakage in a mechanical system? (select all that apply)
Looseness
Misalignment
Corrosion
Damaged seals
Scroll down for the answer...
Answer: Corrosion
Damaged seals
Corrosion eats away pipe material that can create openings for water to leak out. Leakage can also result from damaged watertight seals on our pipes.
Question #10: Why does wear failure occur in a machine? (select all that apply)
Due to materials rubbing against each other
Because of looseness
Because of shaft misalignment
Due to blocked ventilation holes
Scroll down for the answer...
Answer: Due to materials rubbing against each other
Wear is a failure mode that occurs due to materials rubbing against each other.
Question #11: What is the effect of vibration on a machine?
Improve machine cooling and ventilation
No metal-to-metal contact
The machine makes unusual sounds
Machine parts to slide smoothly past each other
Scroll down for the answer...
Answer: The machine makes unusual sounds
If a machine is vibrating, it makes unusual sounds.
Question #12: What are the types of lubricants that are used to lubricate a machine? (select all that apply)
Epoxy adhesive
Oil
M-Seal
Grease
Scroll down for the answer...
Answer: Oil
Grease
The two main classes of lubricants that are used in machinery are:
Question #13: What can cause overheating of a machine? (select all that apply)
High ambient temperatures
Blocked ventilation holes
Using less capacity motor for the application
High or low voltage supply
Scroll down for the answer...
Answer: High ambient temperatures
Blocked ventilation holes
Using less capacity motor for the application
High or low voltage supply
The most likely problems causing overheating are:
Blocked ventilation holes,
Using less capacity motor for the application,
High or low voltage supply, and
High ambient temperatures.
Question #14: What is the function of a mechanical seal?
They regulate the flow of fluid
They prevent fluid used by a machine from leaking into the external environment.
They ensure no debris in the pipeline
They provide cooling to the machine
Scroll down for the answer...
Answer: They prevent fluid used by a machine from leaking into the external environment.
Mechanical seals prevent fluids, like water or oil, used by a machine from leaking into the external environment.
Question #15: What is the first step while installing a mechanical seal on a machine?
Pressing the seal
Lubricating the seal
Ensuring no debris in the pipeline
Provide cooling to the machine
Scroll down for the answer...
Answer: Lubricating the seal
The first step of installing a seal is lubricating it. We need to apply a small amount of grease to the seal and the shaft area in contact with the seal.
Question #16: What are the causes of valve failure? (select all that apply)
Improper pipe material
Debris in a pipeline
Improper valve installation
Operating in excessive high-temperature situations
Scroll down for the answer...
Answer: Debris in a pipeline
Improper valve installation
Operating in excessive high-temperature situations
Some of the causes of valve failure include:
Worn elastomers and seat seals,
Debris in a pipeline,
Operating in excessive high-temperature situations, and
Improper valve installation, maintenance, and assembly.
Question #17: Which components of a valve fail due to corrosion? (select all that apply)
Valve body
Solenoid coil
Valve seat
Valve handle
Scroll down for the answer...
Answer: Valve body
Valve seat
Some of the causes of valve failure include:
Foreign or abrasive debris in a pipeline,
Material incompatibility with the product being processed, and
Temperatures or pressures outside the designed operating parameters.
Question #18: How do we identify solenoid coil failure in a valve?
Sudden change in valve pressure
From the slow opening of a valve
Measuring coil temperature
Locating burn marks on a coil
Scroll down for the answer...
Answer: Locating burn marks on a coil
A symptom of coil burnout is burn marks.
Question #19: What is a way to protect ourselves and avoid electrical risks while troubleshooting a valve? (select all that apply)
Stand right underneath power lines
Lockout Tagout
Use damaged equipment
Disconnecting electric supply
Scroll down for the answer...
Answer: Lockout Tagout
Disconnecting electric supply
If it is necessary to remove a valve from piping, we need to follow the appropriate procedure. This includes:
Disconnecting the electric supply, and
Lockout Tagout.
Question #20: What are the signs of coupling failure? (select all that apply)
Lubricant leakage
Abnormal noises
Smooth power transmission
Excessive vibrations
Scroll down for the answer...
Answer: Lubricant leakage
Abnormal noises
Excessive vibrations
Some external signs that indicate potential coupling failure include:
Abnormal noises,
Excessive vibrations, and
Failed seals indicated by lubricant leakage.
Question #21: What are the causes of coupling failure? (select all that apply)
Selecting the wrong coupling
Misalignment
Lubrication
Installation error
Scroll down for the answer...
Answer: Selecting the wrong coupling
Misalignment
Installation error
Some of the prominent causes for coupling failure include:
Selecting the wrong coupling,
Misalignment, and
Installation error.
Question #22: What are the causes of bearing failure? (select all that apply)
Improper lubrication
Contamination
Failed seals
Poor-fitting
Scroll down for the answer...
Answer: Improper lubrication
Contamination
Poor-fitting
Some of the most common causes of bearing failure are:
Improper lubrication,
Contamination,
Misalignment, and
Poor-fitting.
Question #23: What causes of bearing lubrication failure?
Size of bearing
Vibration
Abnormal noise
Excessive temperatures
Scroll down for the answer...
Answer: Excessive temperatures
If a bearing has been exposed to excessive temperatures, then it can cause the lubricant to degrade.
Question #24: A bearing should be mounted with a ________ on the shaft.
Press fit
Tight fit
Abnormal noise
Loose fit
Scroll down for the answer...
Answer: Press fit
In most instances, bearings should be mounted with a press fit on the shaft.
Question #25: What do we use to dismount a bearing from the shaft?
Dial indicator
Grease gun
Bearing puller
Plier
Scroll down for the answer...
Answer: Bearing puller
To remove failed bearing from housing, we use bearing pullers.
Question #26: What are the types of bearing pullers? (Select all that apply)
Internal bearing puller
Nose clip extractor
External bearing puller
Cross head puller
Scroll down for the answer...
Answer: Internal bearing puller
External bearing puller
There are two types of bearing pullers. These include:
Internal bearing pullers, and
External bearing pullers.
Other References:


